
Quick start
Spantail is a work observability platform: it records what people do as work entries and captures AI-agent activity as agent sessions, then turns both into reports. It is self-hosted — one deployment, on your own Cloudflare account, serving one organization.
This page is a hands-on walkthrough. In about fifteen minutes you go from an empty Cloudflare account to a live instance with a workspace, a project, a day of logged work, and a daily report sitting in your own inbox. Each step links to the reference page that covers it in depth.
Before you start
Section titled “Before you start”A GitHub account and a Cloudflare account. Nothing else: everything below happens in a browser, and no code runs on your machine.
Deploy and set up your instance
Section titled “Deploy and set up your instance”-
Deploy from a fork.
Spantail runs from your own fork, built by Cloudflare Workers Builds. Once it is wired up, every push — including GitHub’s Sync fork button — migrates the database and redeploys on its own.
a. Fork the repository. Open
spantail/spantail, click Fork (top-right), and on the next screen click Create fork. You now ownyour-account/spantail.b. Create the database. Sign in to the Cloudflare dashboard. In the left sidebar open Storage & Databases → D1 SQL Database, click Create, name it
spantail-db, and click Create. Open the new database and copy its Database ID (shown on the database’s page) — this is the one per-instance value you supply in step d.c. Create the bucket. In the left sidebar open R2 Object Storage (enable R2 first if prompted), click Create bucket, name it
spantail-uploads, and click Create bucket.d. Import your fork as a Worker. Open Workers & Pages and click Create. On the Ship something new screen, click Connect GitHub. The first time, GitHub asks where to install the Cloudflare Workers and Pages app: pick your account, choose Only select repositories →
spantail, and install. Back in the dashboard, the Select a repository step lists your repositories: selectspantail, click Next, and set:- Project name:
spantail— must matchnameinapps/web/wrangler.jsonc. - Build command: clear it if a value is pre-filled — it must be empty.
- Deploy command: replace the pre-filled default with
pnpm run deploy:ci. - Expand Advanced settings:
- Path:
apps/web - Add variable:
D1_DATABASE_ID= the Database ID you copied in step b.
- Path:
Click Create and deploy. The first build applies the migrations and deploys the Worker. When it finishes, the Worker’s page shows its public address —
https://spantail.<your-subdomain>.workers.dev(the Visit button opens it). This is your instance’s URL; you sign in there in step 2.e. Add the session secret. The Worker now exists but signs no sessions yet. Open it → Settings → Variables and Secrets → Add, choose type Secret, name it
BETTER_AUTH_SECRET, and paste any value of at least 32 characters (for example, runopenssl rand -base64 32in any terminal, or use a password manager). Deploy it: Deployments → Retry deployment (or push any change to your fork).You do not need to configure an origin — Spantail derives one from each request. To pin a custom domain, or to deploy from your own machine with Wrangler instead, see Deploy to Cloudflare and Configuration.
- Project name:
-
Become the instance administrator.
Open your instance’s
*.workers.devURL from step 1. The login screen appears; switch to the sign-up form with the No account? Sign up link at the bottom. On a fresh instance, public sign-up is open until the first account exists: the first person to sign up with an email and a password becomes the instance administrator, and sign-up then closes. Everyone else joins by invitation.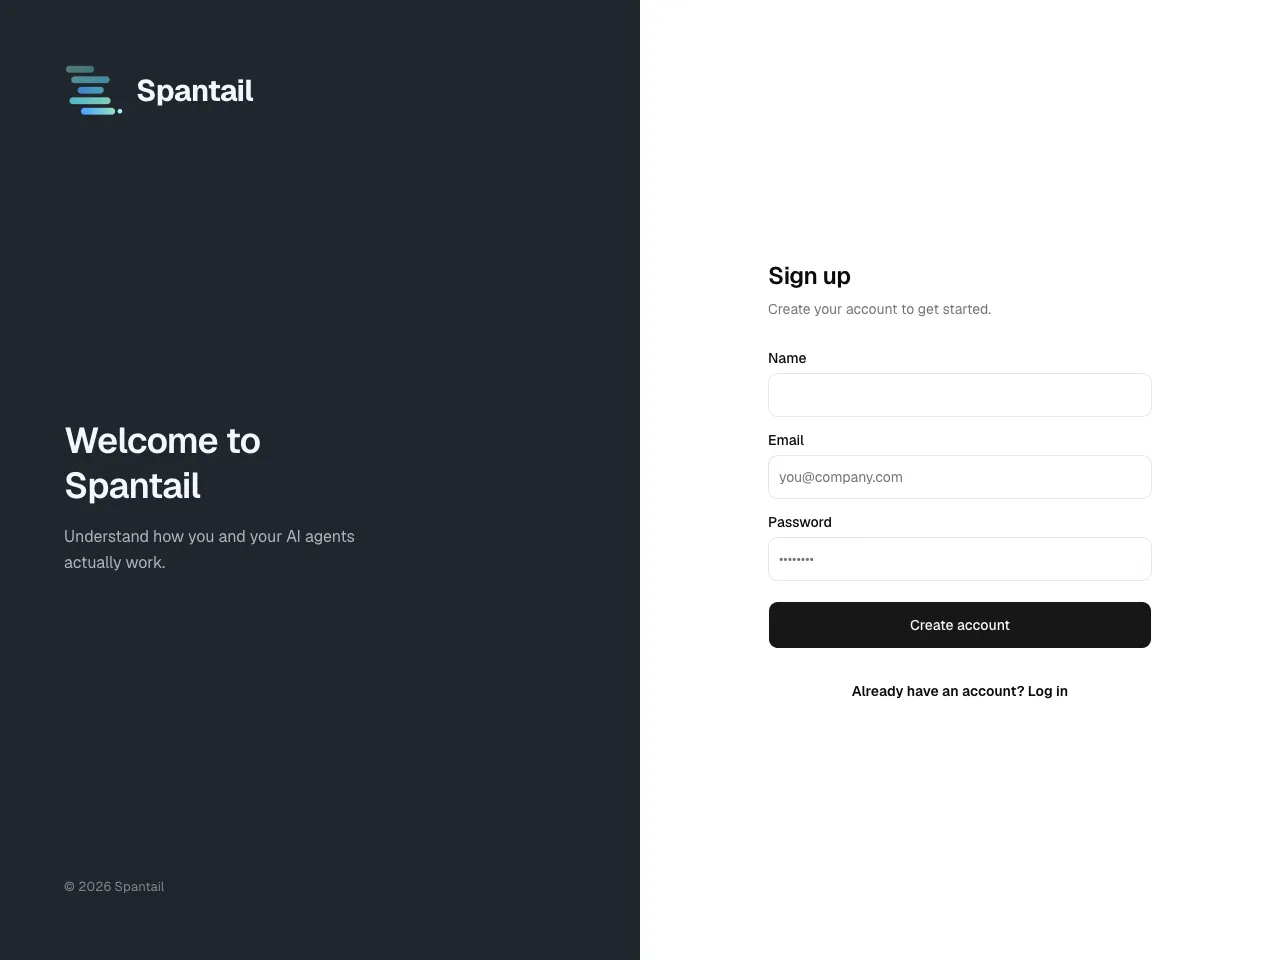
Sign up. You land in the setup wizard, which has five steps. The first two are the ones that matter here:
- Create your first workspace — a name and a slug. A workspace is the organizational unit that holds your projects and your work.
- Create a project — a name and a slug. Projects group the work you log; an entry can also stay workspace-wide.
Skip Instance settings and Invite your team for now. Email delivery needs a Workers Paid plan and a verified sending domain, and you can invite people later from User management. Finish the wizard to land on your new workspace’s dashboard.
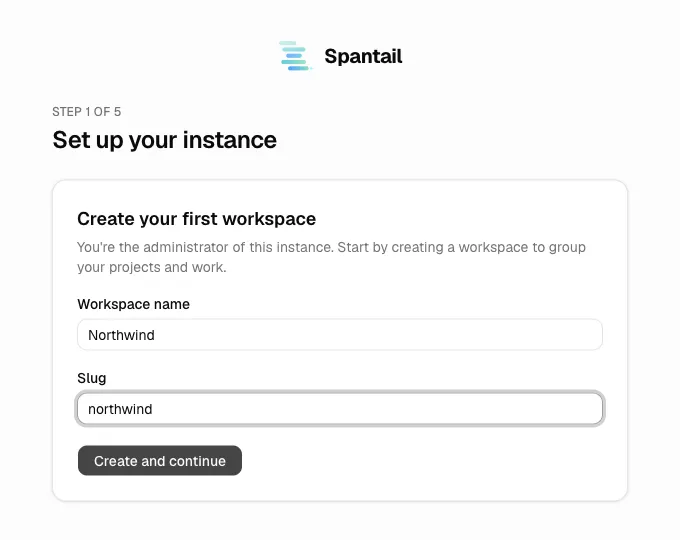
The wizard only covers the first run; everything it sets up is editable later from the Settings hub. See Initial setup wizard, Workspace settings, and Projects.
-
Log today’s work.
The dashboard shows your workspace’s timeline. Click the + button (or press C) to open the entry dialog, and fill in:
- Project — the one you just created.
- Date — today, in your timezone, by default.
- Description — what you worked on.
- Duration —
90,90m,1.5h, and1h30mall mean the same thing.
Save, and the entry appears on the timeline. Log two or three so the report in the next step has something to say; the Keep entering toggle keeps the dialog open between them.
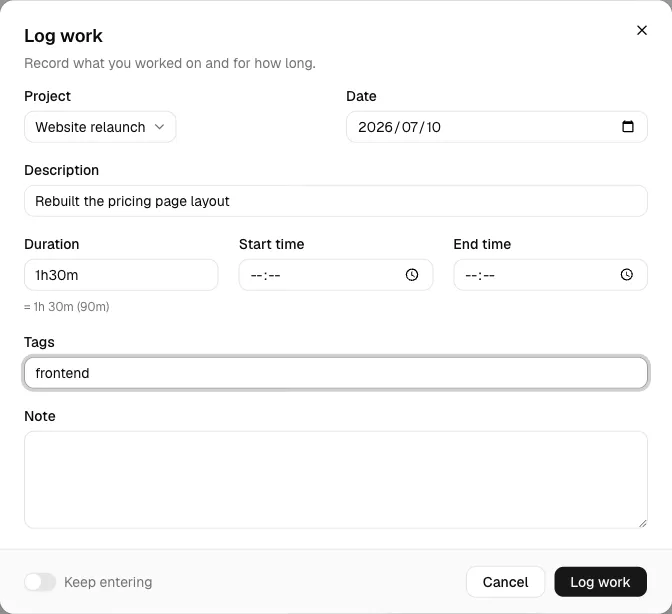
Entry dates are frozen in the author’s timezone, so set yours under Account & preferences if it isn’t right. The full details are in Logging work.
-
Create a daily report.
Reports are user-scoped, so they live in the header’s top-right corner, not in the workspace sidebar. Open Reports and click New report. The form is on the left, a live preview on the right. Set:
- Template — the presentation format. Your instance has none yet, so the starter templates are seeded automatically and Daily report is preselected.
- Workspace — the one you created.
- Date range — the Today preset, already pre-filled by the Daily template. That is what makes this a daily report.
The name and the note fill themselves in from the template. Save to render the report.
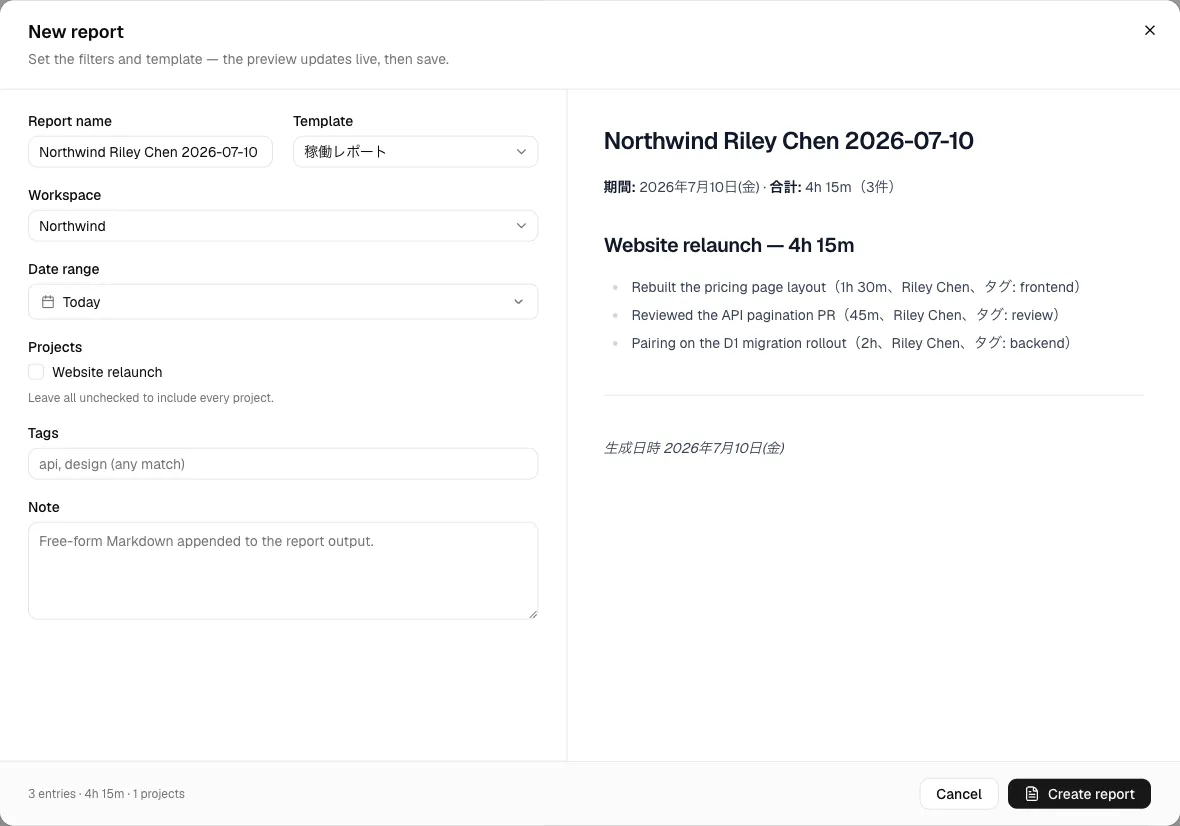
A saved report is an immutable snapshot: editing it appends a new version rather than rewriting the old one, so a report always reflects the data as of when it was rendered. See Reports & messages and Report templates.
-
Send it to yourself.
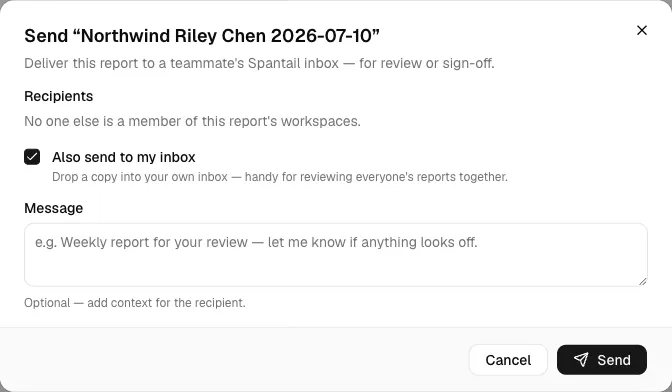
Click Send in the report’s toolbar. Leave Recipients empty, tick Also send to my inbox, and send. Spantail confirms with “Saved to your inbox.”
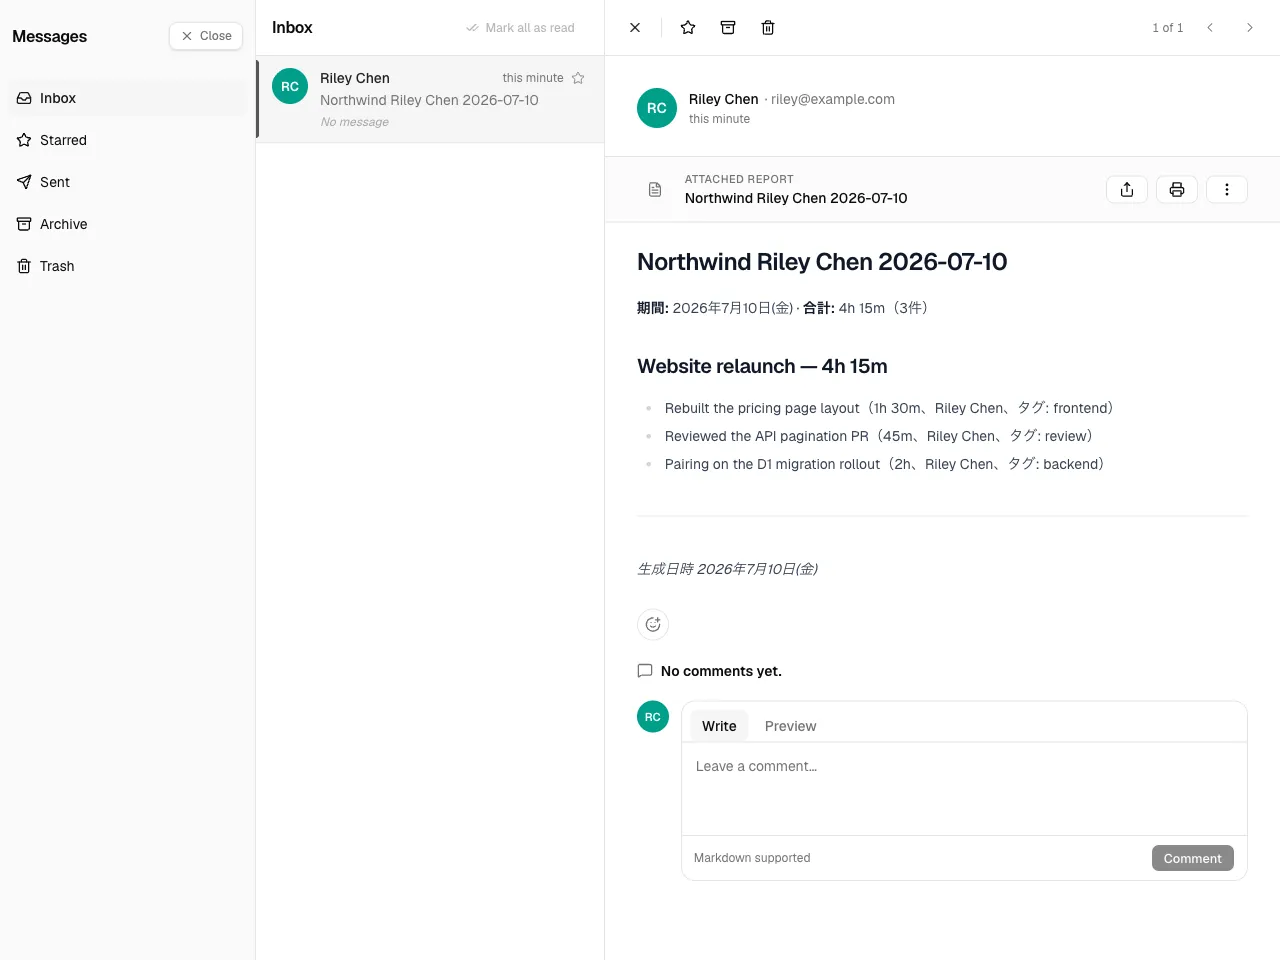
Open your inbox from the header’s top-right corner to read the copy you just sent. Every sent version carries its own discussion thread: Markdown comments and emoji reactions, visible to the sender and that version’s recipients.
What you built
Section titled “What you built”A Spantail instance on your own Cloudflare account, with a workspace, a project, a day of work, and a daily report delivered to your inbox. Everything you logged lives in the workspace; the report is yours, and yours to share.
Every word you just met — workspace, project, work entry, report — is defined in the User Guide overview.
Where to go next
Section titled “Where to go next”- Setup Claude Plugin — the next hands-on: capture your agent sessions and turn them into work entries and reports.
- Logging work — log work entries in the web UI.
- Projects & timeline — browse projects and your work timeline.
- Reports & messages — create, share, and discuss reports.
- Capturing agent activity — capture the sessions your AI agents run.
- Account & preferences — API tokens, language, theme, and timezone.
- CLI and MCP — log and read your data from outside the web app.
To bring your team in, turn on email delivery and social login in System settings, then invite people from User management.